Execution of Project Proposal
Contrary to the project proposal, the team moved forward with FFF printing over SLS printing. The decision was made to print a proof of concept on an FFF printer, and then look more into SLS printing if the outcome of the test print was less than desirable. The first test print was a success, so the team decided to print the rest of the book using FFF printing and cease pursuing SLS printing. Due to the 20+ pages to be printed and the 60+ minute setup time for SLS printing, SLS small build volume, as well as the larger availability of FFF printers through the Makerspace, the team determined that FFF printing is more feasible than SLS printing.
The team also decided to skip implementing an Arduino audio playback device for the book due to time constraints. In the future, implementing an audio playback system would be great for other users of the book to be able to learn braille / follow along with the reader.
Page Design
Braille
The team decided that transcribing the pages from English to Braille would be the best fit for having words on the 3D printed pages. Rather than a language, Braille is almost a 1:1 transcription of English. Each English letter can translate to one Braille character. Of the six dots used in a Braille character, some of the dots are raised to denote a letter, digit, or punctuation mark. Please see Figure 1 below for the standard English Braille Alphabet, also known as Grade 1 Braille.
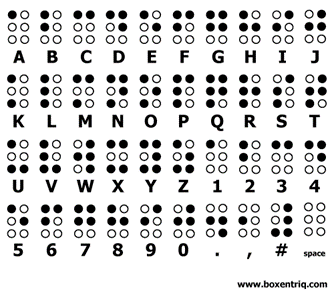
Figure 1: Standard Grade 1 Braille
There are three different “Grades” of Braille, all differing slightly. Since Grade 2 is most commonly used in the US, the team decided to use Grade 2 Braille on all of the pages. In addition to the 26 English letters, 10 digits, and common punctuation, Grade 2 Braille also includes contraction characters. These contractions make Grade 2 Braille words shorter than Grade 1 Braille words, which do not include contractions. Please see Figure 2 below for the contractions used in Grade 2 Braille. Grade 3 Braille is the least commonly used and is not taught in schools, so it was not considered for this project.
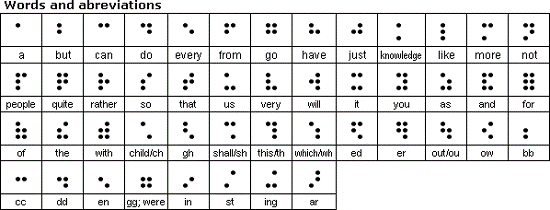
Figure 2: Grade 2 Braille Contractions
To transcribe the English sentences in “Sunflower Lion”, a Java program was written that outputs a PNG file containing the Braille for the corresponding page. See Figure 3 below for an example. The program correctly spaces the Braille characters and dots within each character according to the English standard.
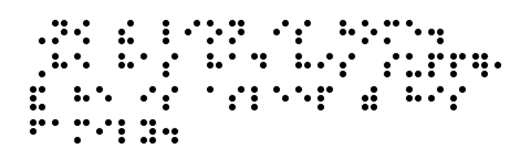 Figure 3: Example of Braille PNG Output by Java Program
Creating the Page SVG Files
To translate the 2D book pages into a 3D model, a repeatable procedure was developed. A simplified model of the procedure can be seen below in Figure 4.

Figure 4: Page modeling model
First, the 2D book pages were scanned into a PDF format. The book pages were then brought into word and centered on the page. The word pages used a square format with a black border around the page. Next, a cropped version of the Braille PNG file for that page was pasted over the corresponding English words. An example of the page creation process can be shown in Figure 5 below.
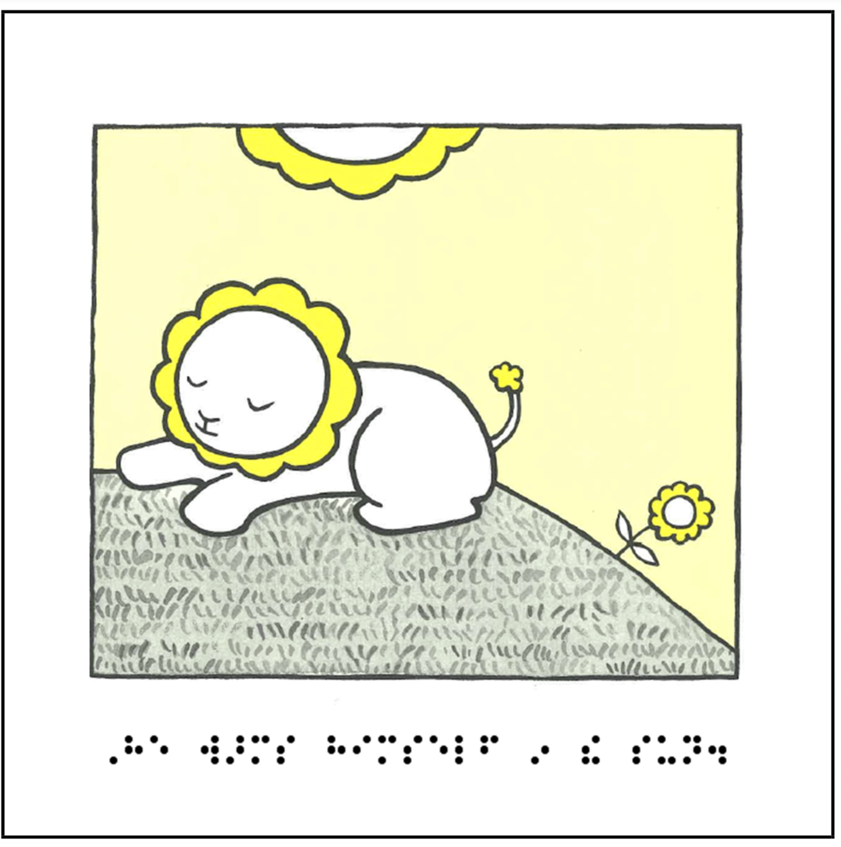
Figure 5: Example of completed page in Word
Next, that page was converted into a PNG. The PNG was then converted into an SVG file. SVG file conversion works by tracking lines around shapes and then turning them into profiles. The file conversion procedure can be shown in Figure 6 below.
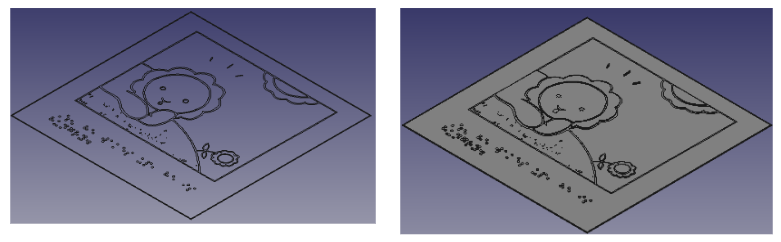
Figure 6: SVG to 3D file
When the PNG file was converted to SVG a black border was needed to define the outside of the page. To convert the file to a 3D file, FreeCAD (open-source free cad software) was used. Using a SVG import feature in FreeCAD, we were able to import the SVG file and convert all of the profiles into objects that could be extruded. The Braille characters were set to a height of 1 mm, and the other shapes on the page were set at heights up to 4 mm. Once all of the important shapes and characters were extruded, the STL file was exported and ready to 3D print.
Ultimaker S3 printers at the Makerspace were used to print the pages at an 8 in by 8 in size. Uniform scaling was turned off in Cura to leave the Z height of the file alone and adjust the X and Y size to enable the largest print possible. Pages were then printed one by one. An example of the printed page printed in white PLA can be shown below in Figure 7.
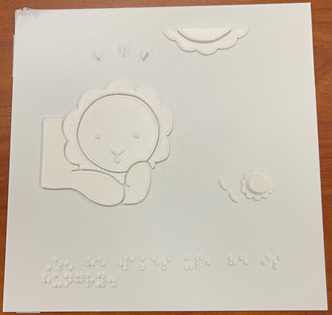
Figure 7: Test print done at the Makerspace
Future Work
An evaluation must be made regarding the dimensions of the Braille. The Braille must be printed so it is clear for a blind child. Testing the Braille will be done, such as comparing the printed Braille to the standard design. The extrusion height of each element in the pictures must also be evaluated. Each page is either 4 mm or 5 mm in total height. The group must decide if these heights give enough definition between elements on the page. Final page designs will continue to be printed. There are 20+ pages that need to be printed at the Makerspace. Finally, three holes will be drilled on the side of each page so the pages can be bound together to make a complete book.
With such a short time, the team had to cut out parts of the project that could elevate the final product or provide other methods of producing pages. The following are future work opportunities that are out of the scope of this group:
Although the team decided against using SLS for this print, more work can be done to prove whether or not a powder bed printing method would be ideal for this type of print. If more time permitted, the team would have conducted a test print with the SLS printing in the PEC and determined if the quality was superior to FFF. Down the line, a strength of a process like SLS is that if a comprehensive CAD file was generated for the entire book, it could be completed in a single print. This method could prove to be the most efficient for producing more of these books, but more time is needed to develop our understanding of the process and its pitfalls. Another benefit of the SLS printing process could be creating more flexible, paper-like pages. This would allow the final bound product to be smaller and easier to handle, as well as represent a feel and texture closer to a paper book.
Another path of future work could include implementation of an Arduino to bring audio into the experience. The audio playback could be triggered through the turning of pages or by the reader or helper through touch sensing. This would require additional bulk in the book, so creating a stand alone unit to pair with each book could be investigated as well. While the group will not be pursuing this in the scope of this project, This would be a great opportunity to expand the product for more users.
Lastly, implementing software to recognize colors or textures of the illustrations would bring another layer of tactile feedback to the user. Different colors or textures would be printed in different roughness’s. This would require either manual interpretation of each texture by the engineer or a program that would cross different images with known textures to apply the current roughness’s to each part of the illustration. This would be difficult due to the vast differences in authors’ art styles, but could make the printed books much more interesting for the user.