Initial Print Results
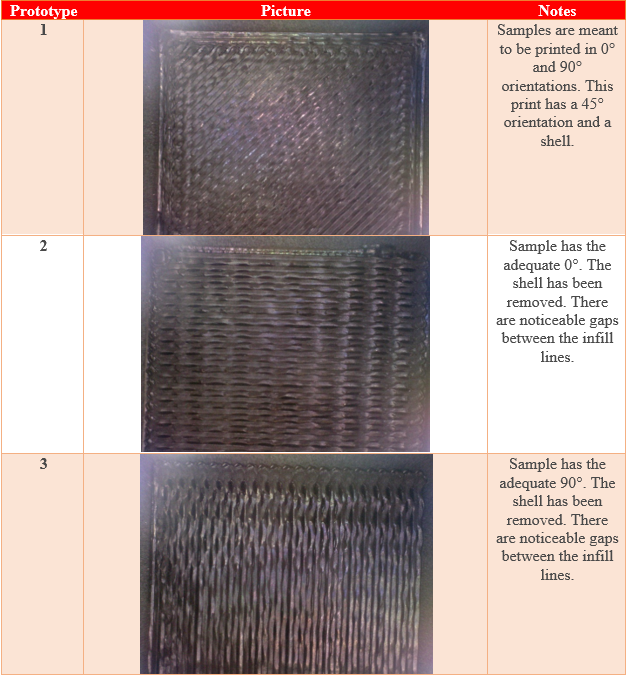
The first step of the project was to manufacture sample prints and correct for any deviations and defects that may occur. The samples made at the MakerSpace were printed using Black PolyLactic Acid (PLA), and many defects were apparent such as noticeable gaps and deviations from the intended orientation. The causes of these defects difficult to pinpoint. Table 1 holds the various print prototypes made at the MakerSpace, highlighting the aforementioned defects.
Table 1: Test samples printed at the Makerspace
Print Optimization
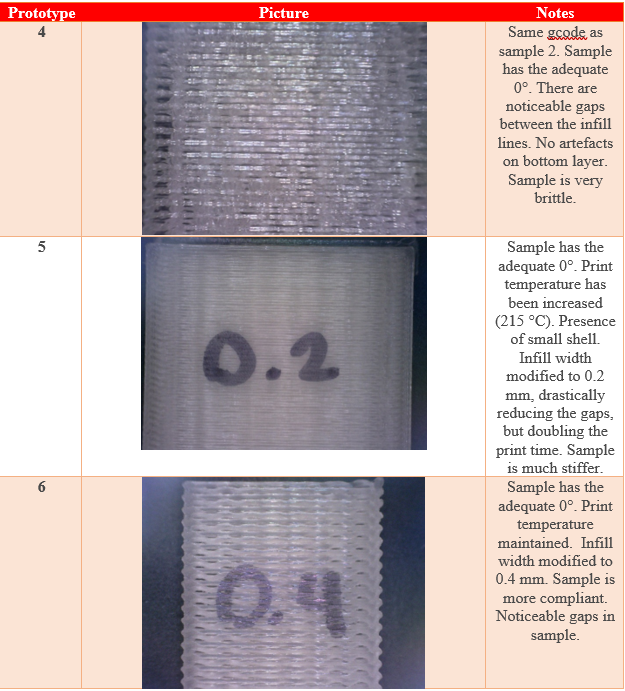
The samples prepared at the MakerSpace, had various printing defects/artefacts on the bottom layer, and demonstrated gaps between the infill lines. Sample prototyping was moved to the Polymer Engineering Center to better control the print quality, and utilize natural-PLA (Nat-PLA) instead. Table 2 highlights the improvement in the print quality of the samples.
Table 2: Test samples printed at the Polymer Engineering Center
MicroCT scanning was performed on three samples with infill width varying from 0.2 mm to 0.4 mm to observe the presence of voids throughout the thickness, which are shown in Table 3.
Table 3: Effect of infill width on sample quality

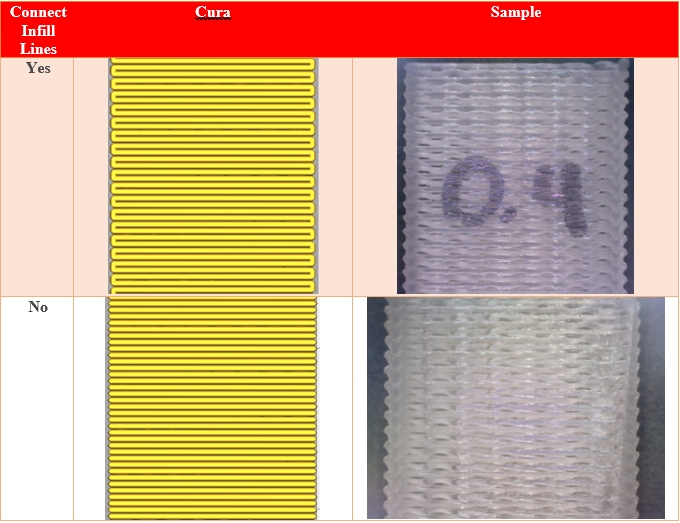
The smaller infill width led to a finer sample quality; with a smoother finish and a heavier and opaquer sample. The largest infill width felt rougher, lighter, and more transparent. When observing the microCT scans, the smaller infill width had more voids and defects throughout the sample, as opposed to the largest infill width, that appeared to be much more symmetrical. The cause of the crisscrossing pattern, which inadvertently lead to the formation of small gaps, was determined to be caused by an infill setting (“connect infill lines”). This setting was turned off and another prototype was made shown in Table 4.
Table 4: Comparing Final two prototypes
Future Work
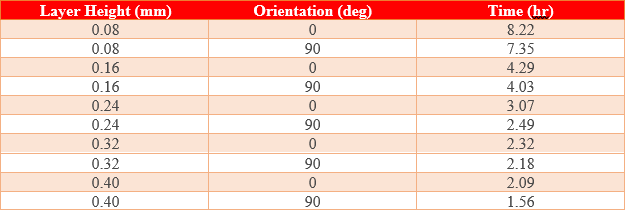
With the printer settings standardized and the sample defects eliminated, printing of the samples required for the tensile testing of the “constant thickness, variable layer height” experiment will be complete according to the schedule on Table 5. Each batch will consist of 8 samples.
Table 5: Sample preperation schedule
Once all the samples have been prepared, a Universal Testing Machine will be utilized to perform tensile testing.The displacements, Xt and Yt , will be observed from the stress and strain data captured. With 8 samples, average values and standard deviations will be acquired and compared.